Enabling SCOM Maintenance Mode from a Monitored Computer
System Center Operations Manager 2016 (SCOM) came out with a feature that many have been waiting for, placing agents in maintenance mode from the agent itself. In this guide, I will show you how quickly and easily it can be done.

Contents
Prerequisites
Verifying the Agent on the monitored computer
Importing the PowerShell module for maintenance mode
Setting the agent in maintenance mode
Verifying the SCOM Management server that the agent went into maintenance mode
Prerequisites
System Center Operations Manager 2016 or newer.
A computer with SCOM agent installed.
Verifying the agent on the monitored computer
First of all, we will simply verify that the monitored computer has the SCOM agent installed, before proceeding.
Let's start by logging on the computer monitored by SCOM.
Once we are logged on to the monitored computer, we will go to the control panel to verify the SCOM agent, go to Start and write "Control Panel" and then click on Control Panel.

3. The Control Panel should now have opened for us.

4. Once we are in the Control Panel, type "Monitoring" in the search field which can be found in the upper right corner, we should see the Microsoft Monitoring Agent in the search result, open it by clicking on it.

5. The Microsoft Monitoring Agent Properties window will open up and we will see our SCOM agent configuration.

6. If everything looks OK we will continue to the next step.
Importing the PowerShell module for maintenance mode
We will not go through how to import the SCOM maintenance mode PowerShell module.
In this guide, we will use my DPM server as a test subject.

We will now open up a Windows Explorer and browse to the SCOM agent installation folder
C:\Program Files\Microsoft Monitoring Agent\Agent\

2. The PowerShell module for the SCOM maintenance mode is called MaintenanceMode.dll, we will search for it in the SCOM agent installation folder by typing the exact name of the dll file.

3. The first search result should be the dll file we searched for, now that we made sure that it exists we can continue to import the module into PowerShell.
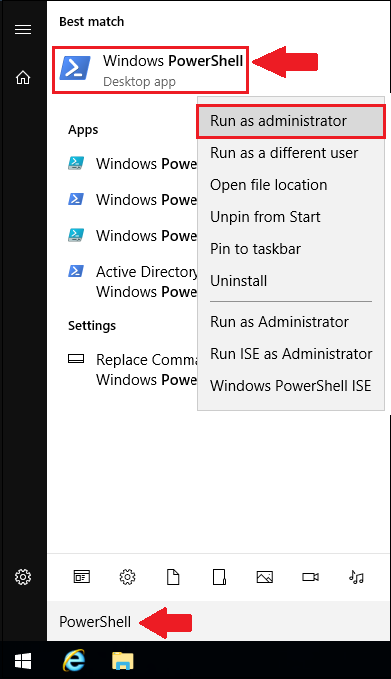
4. Go to Start and search for "PowerShell", right click on PowerShell and choose Run as administrator.
5. We should now have a PowerShell window open.

6. Now we will import the MaintenanceMode.dll PowerShell module by typing the following into our PowerShell window: Import-Module "C:\Program Files\Microsoft Monitoring Agent\Agent\MaintenanceMode.dll"

7. Hit Enter to import the module, once it's done we should be able to start using the SCOM maintenance mode cmdlets.
8. Once the importing of the module is successful we will use the Get-Help to see closer on the SCOM maintenance mode module commands, for this guide I will use the -ShowWindow switch to make it more clear.
9. Type Get-Help Start-SCOMAgentMaintenanceMode -ShowWindow in our PowerShell window.

10. A Start-SCOMAgentMaintenanceMode Help window should appear on our screen.

11. The following list of reasons are acceptable by the cmdlet:
PlannedOther
UnplannedOther
PlannedHardwareMaintenance
UnplannedHardwareMaintenance
PlannedHardwareInstallation
UnplannedHardwareInstallation
PlannedOperatingSystemReconfiguration
UnplannedOperatingSystemReconfiguration
PlannedApplicationMaintenance
UnplannedApplicationMaintenance
ApplicationInstallation
ApplicationUnresponsive
ApplicationUnstable
SecurityIssue
LossOfNetworkConnectivity
12. In the help window we can see the syntax and all the parameters required to run the command to start maintenance mode on the monitored computer.
Setting the monitored computer in maintenance mode
The syntax that we will use to start a maintenance mode request is
Start-SCOMAgentMaintenanceMode.
Every SCOM agent has a Rule that runs a PowerShell script
(ReadMaintenanceModeRegEntry.ps1) every 5 minutes to read the registry entries on the agent computers.
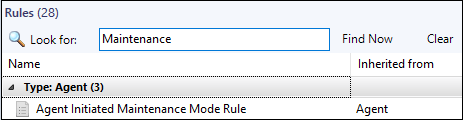
Note: The Agent Initiated Maintenance Mode Rule is disabled by default, you will have to create an override to enable it.
Once the SCOM management server has successfully read the registry entry, it will write an event to the Oparations Manager event log with the Event ID 2222 and it will put the agent computer in maintenance mode.
We will now perform a simple test to see what happens when we run the:
Start-SCOMAgentMaintenanceMode PowerShell command.
In this test, I will put the monitored computer in maintenance mode for a duration of 1 hour (60min).
1. To start the maintenance mode request of an agent the only requirement needed is the duration of the maintenance mode period.
2. Type the following command to start the maintenance mode request with a duration of 1 hour: Start-SCOMAgentMaintenanceMode -Duration 60 then hit Enter to run the command.

3. We will now be prompted if we want to continue with this operation.

4. Type Y for Yes and N for No, in our case we will go ahead and type Y.

5. Once the PowerShell command has run, it will write information to the Windows registry on the agent computer (HKLM:\Software\Microsoft\Microsoft Operations Manager\3.0\MaintenanceMode\Record)

6. If we try to run the Start-SCOMAgentMaintenanceMode again before the previous maintenance period is over we will get the following message:

7. Now that we have run the PowerShell command, we can confirm that the maintenance mode request is successful by opening the Event Viewer and look in the Applications and Services Log\Operations Manager event log for the event ID 2222.

We have now successfully created a maintenance mode request.
Verifying the SCOM Management server that the agent went into maintenance mode
Lastly, we will verify that our agent really went in maintenance mode for 1 hour (60min), we will check this on the SCOM management server.
Logon to our SCOM management server.
We will start by first checking the Operations Manager event log in the Event Viewer, for the Event ID 2223.
Open the Event Viewer, expand the Applications and Services Log and select the Operations Manager event log.


4. We can see that the SCOM management server has successfully put the agent computer, DPM.lab.ad in our case in maintenance mode.
5. Next we will also check the Operations Manager console in the Monitoring view if the agent computer really is in maintenance mode.
6. Open the Operations Manager console.
7. We should automatically start in the Monitoring pane, on the list of monitoring items on the left side go to Windows Computers and find our agent computer where we initialized the maintenance mode.
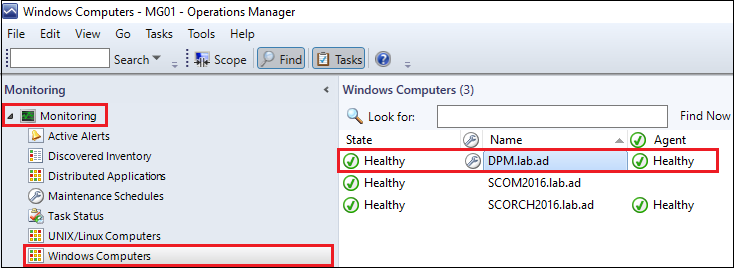
8. We can now see that the DPM server is successfully in maintenance mode.
There we go, this is how easy it is to start maintenance mode from an agent computer.
Top Tip: Connection Center, our code-free SCOM integration tool for ServiceNow can be set up in just a few clicks, enabling you to; convert critical SCOM alerts into actionable ServiceNow incidents in real-time, correlate server down alerts, schedule maintenance mode, and much more.
Find out more >>> www.cookdown.com/connection-center-servicenow